If I’m honest, I never really used to care that much about American pancakes, especially since being gluten free. I was always more of a crêpe type of person. But I think these yummy yeasted overnight pancakes have completely changed my mind. 😛
If, like me, you’re a bit unimpressed with sad, slightly dry/dense gluten free pancakes… then I highly recommend giving this yeasted recipe a try.
The long fermentation process gives the batter such a delicious flavour and texture. They’re so fluffy and tender! And of course, you know me, I had to add my favourite secret ingredient – glutinous rice flour 😛 – which added an unmistakably ‘gluteny’ elastic feel.
Maybe I’ve just forgotten how wheat pancakes are really like, but to me, these come pretty close. If I ever have non gluten free guests staying over and I’m serving pancakes for breakfast, this will be my go to recipe for sure!
P.S.: I added a cheeky custard filling in some of mine which was absolutely delicious!
Is glutinous rice flour gluten free?
YES! It’s naturally gluten free. 🙂 I know the word ‘glutinous’ sounds sketchy, but it’s just a type of rice that is particularly sticky. That’s all.
Can I swap it for normal rice flour?
No, glutinous rice is quite different from other rice varieties – it has a uniquely elastic texture – so you definitely can’t substitute one for the other.
Where can I buy glutinous rice flour?
The best places, by far, are Asian supermarkets. But you can also order it online.
I know it’s a bit of a hassle to source strange flours not easily found in mainstream supermarkets, but trust me, it’s well worth it. It makes gluten free foods SO MUCH more enjoyable.
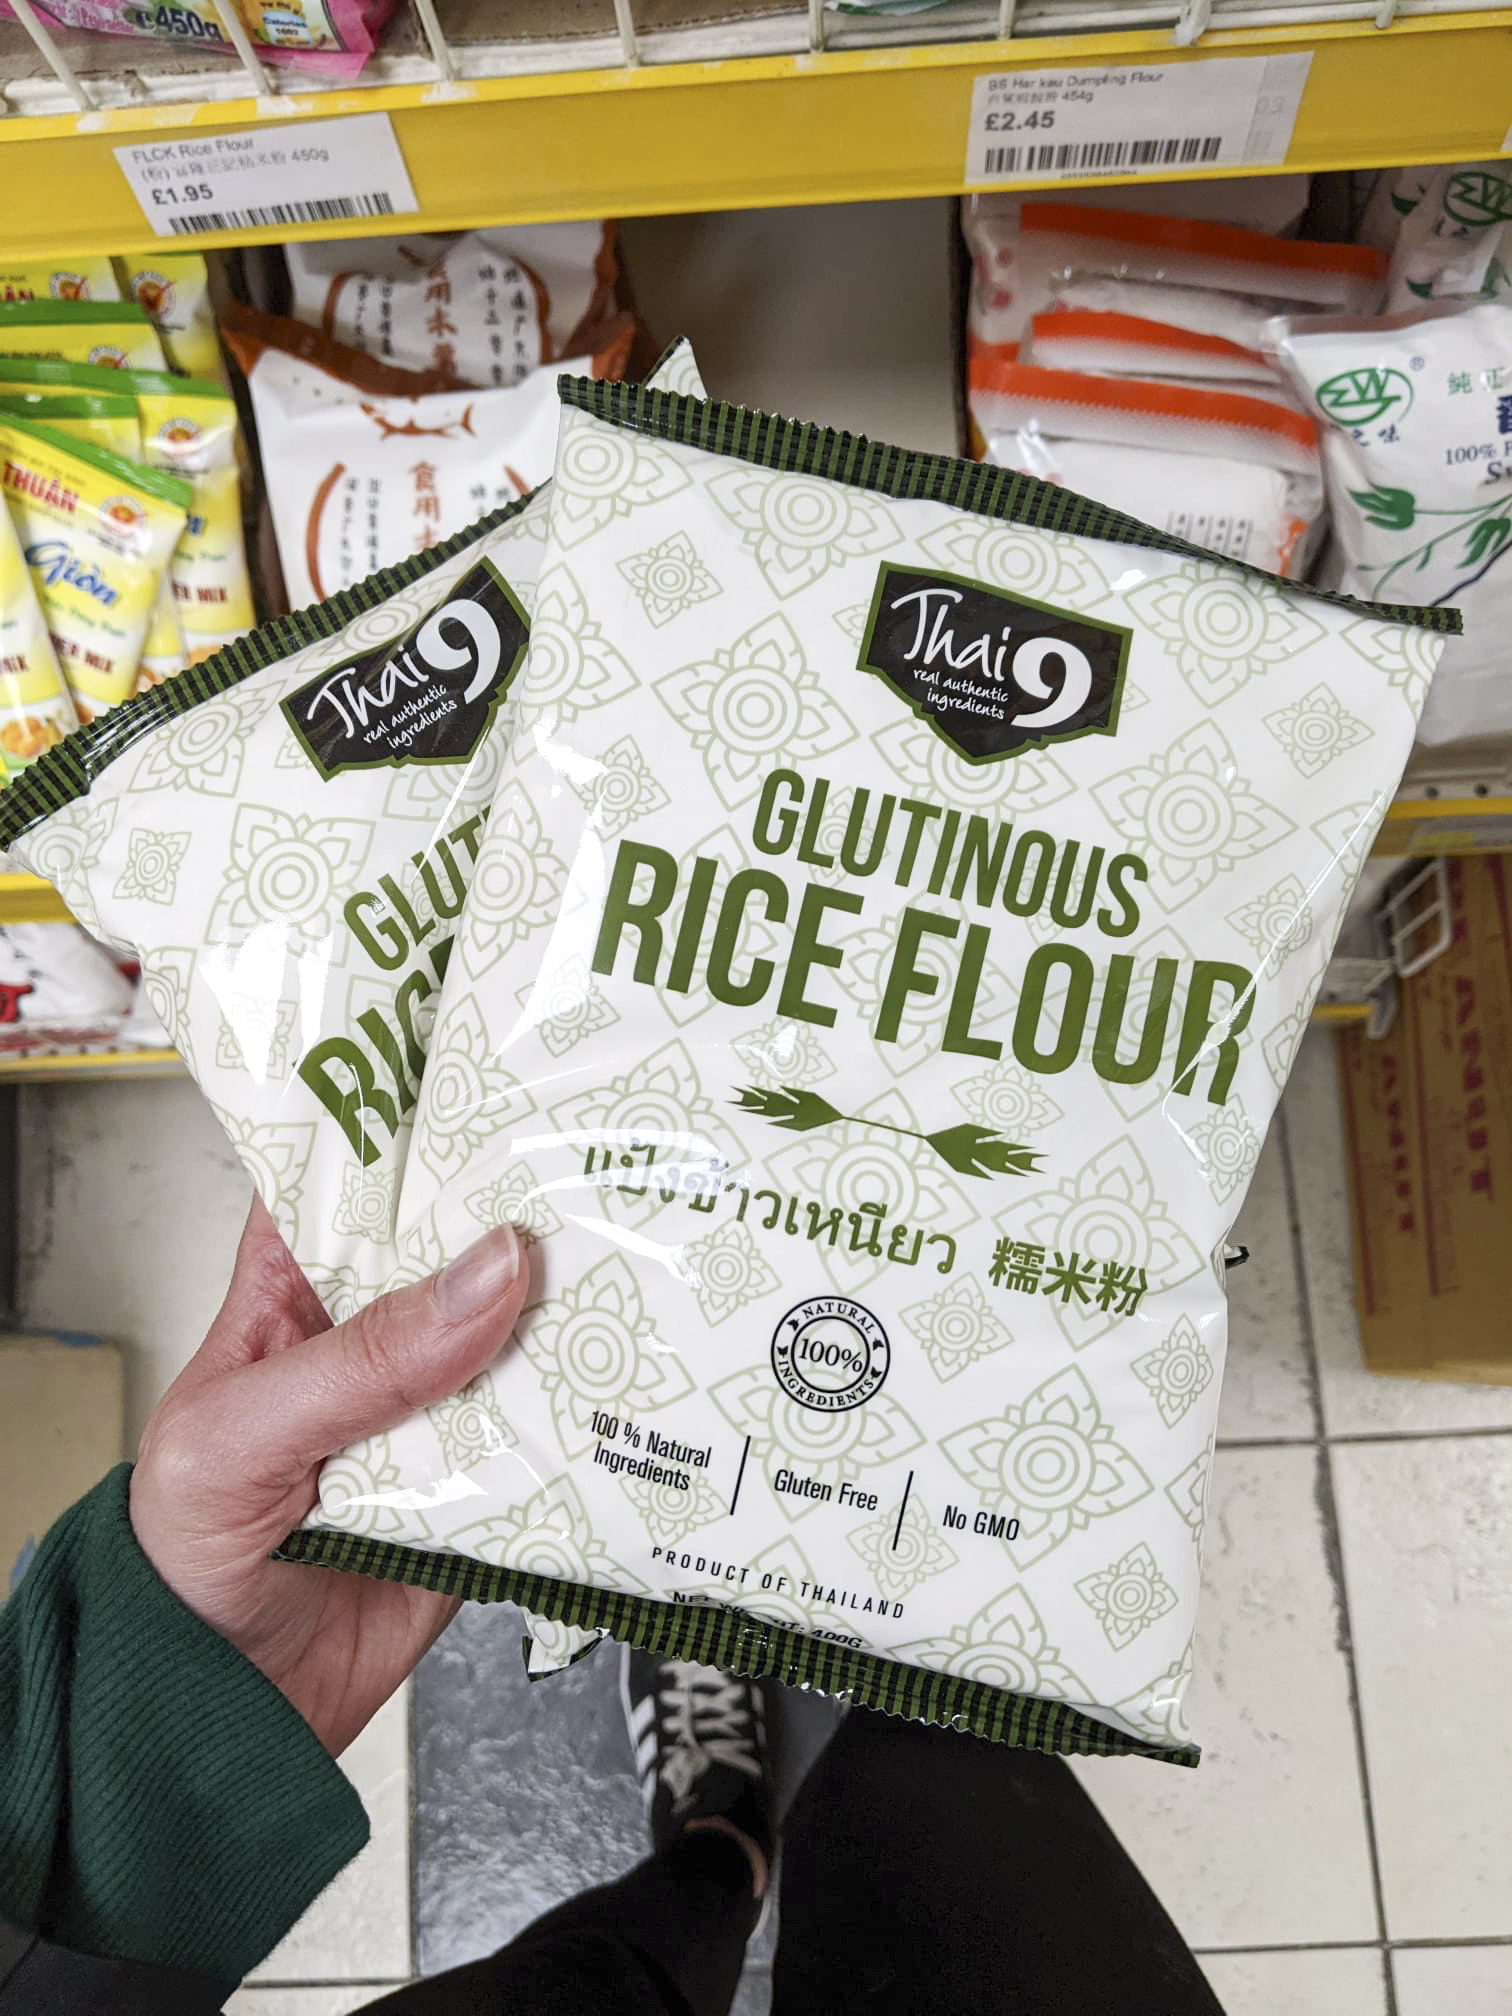
This is the one I buy in my local Chinese supermarket. It’s by the brand Thai 9 which is labelled gluten free. 🙂
I can’t find glutinous rice flour, is there a good substitute?
While it’s not quite the same, tapioca starch is a good substitute. It improves the texture of gluten free foods in a similar way, but it is a step down from glutinous rice flour in my opinion.
Can I omit the yeast?
Technically yes, but bear in mind that the taste and texture won’t be ANYWHERE NEAR as good. Yeast is an integral part of this recipe.
This recipe yields 10 small pancakes
This is about 2, maybe 3 servings. Multiply as needed.
How can I store leftovers?
It’s unlikely you’ll have leftovers unless you make a bigger batch. 😛 But you can keep them in an air tight container or a ziplock bag in the fridge.
Just pop them in the toaster briefly to warm them up again! That’s what I did this morning and they were still just as good as the day before, surprisingly!

- 55g glutinous rice flour
- 55g gluten free all purpose flour blend (I used ASDA free from)
- ¼ tsp xanthan gum (optional / only if your flour blend doesn't already contain it)
- 30g sugar
- 1 tsp baking powder
- Pinch of salt
- ½ tsp easy bake yeast (I use Allinson)
- 1 large egg
- 130g whole milk
- 15g butter
- Cooking oil of your choice (I used coconut oil)
- Optional: filling of your choice (Nutella, custard, jam, peanut butter, etc.)
MULTIPLY IT AS NEEDED! 🙂
Cooking time: 4 minutes per pancake
Heat: very low
Directions
PREPARE YOUR PANCAKE BATTER:
- Mix all the dry ingredients together in a bowl: the two flours, sugar, baking powder, salt and yeast. Note: you can make them without yeast, but the flavour and texture won’t be the same.
- In a small saucepan, heat up the milk and butter together on very low heat. Make sure it doesn’t reach boiling point or a simmer. You just want to warm it up enough to melt the butter, but that’s it. Note: you can do this is the microwave too, of course.
- Pour the warm buttery milk into the dry ingredients, little by little, and mix with a spatula or whisk until the batter is smooth and lump free.
- Then finally, stir in the egg.
- Cover your bowl with a lid (or cling film) and place it in the fridge for 24 hours or overnight. By then, it should have doubled up in size. Note: ideally you can let it rest in a warm place for an hour or two BEFORE putting it in the fridge, but it’s not 100% necessary.
COOK YOUR OVERNIGHT PANCAKES:
- Heat up a tiny bit of coconut oil in a non-stick frying pan on very low heat and spread it all around. Just enough to have a very thin coating (about a quarter of a teaspoon).
- Once the pan is hot, add a few small blobs of batter (I like using an ice cream scoop for this).
- Cook for about 2 minutes (or until the bottom is a nice golden colour) without touching or disturbing them.
- Then flip them over and cook for another 2 minutes. Note: if you want to add a filling, add it before flipping them over; cover with a little extra batter, then flip. 🙂
- Repeat with the rest of the batter and add a tiny bit of extra coconut oil before each batch.
NOTE: bear in mind that the cooking time may vary depending on the size of your pancakes. Mine are fairly small. Larger ones will take longer.
Hope you enjoy them! 🙂
Kimi x


