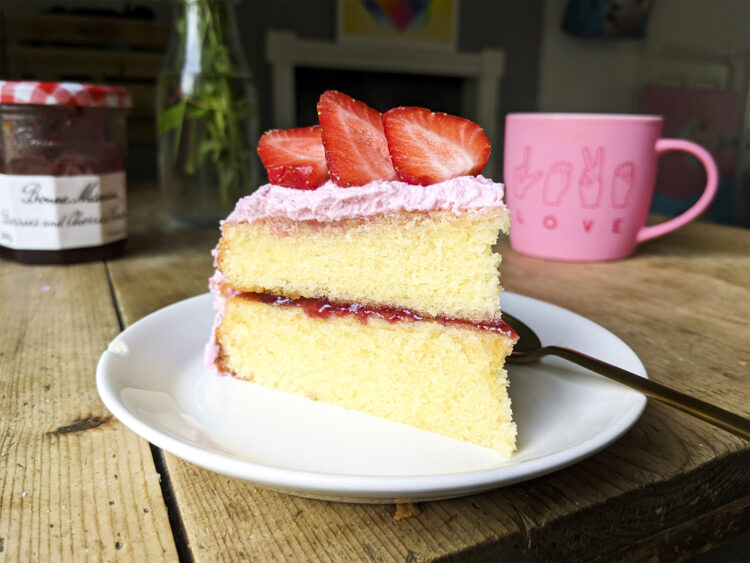
Do you struggle with gluten free sponge cake that comes out dry and underwhelming? If so, you’re not alone!
Ever since getting into baking, a good Victoria sponge that feels tender, springy and has just the right amount of moisture has seemed somewhat elusive to me. And to be fair, this issue isn’t confined to the world of gluten free baking. If you take a quick look online, it’s a thing that seems to plague a lot of us amateur bakers.
Yet, virtually all recipes I’ve looked at are the same… with only slight variations in ingredient amounts. It’s always the classic 4 ingredients – self-raising flour, sugar, butter and eggs.
For ages I kept thinking “what am I doing wrong?”
But then it hit me. What if it’s meant to be that way and I’m just looking for something better? lol
And yep, sure enough. After a bit of research and a few experiments, I think I’ve finally nailed it. At last, I’ve made a sponge cake that I’m happy with.
Maybe I’m late to the party with these tricks. After all, I’m not a cake expert. You guys know I love baking, but to be fair, cakes have never been my specialty or a focus of interest (until recently).
But here’s my advice to other beginners: forget the classic recipe. With just a few tweaks, gluten free sponge cake can be so much better. 🙂
HOW TO MAKE VICTORIA SPONGE MOIST?
Add sour cream and oil
The classic flour-butter-sugar-egg recipe just doesn’t cut it in my opinion. Adding a touch of sour cream and oil makes such a big difference.
Don’t overcook your cake
Of course, it’s not all about the ingredients. Cooking your sponge just right is key.
All ovens vary so you may need to experiment a bit to figure out the ideal cooking time. Your cake should be lightly golden and springy to the touch.
To know if your cake is ready, poke it with a metal skewer or knife. If it comes out clean, it’s done! If not, keep cooking.
Brush a simple syrup on your cake
Once your cake has cooled down, brush a simple syrup all over with pastry brush. This will inject and lock in some moisture into your sponge.
You can either use an equal mixture of sugar and water (cooked briefly on low heat) or you can use honey or syrup, watered down with a bit of hot water.

- 80g gluten free self-raising flour blend (I used ASDA)
- ½ tsp extra baking powder
- 80g caster sugar
- 80g butter (softened / room temperature)
- 40g sour cream
- 15g olive oil
- 2 large eggs
- ¼ tsp xanthan gum (only if your blend doesn't already contain it)
- 2 tsp baking powder
- Honey or syrup (to brush on top)
- Jam (I used Bonne Maman)
- Buttercream or whipped cream icing
- Fresh berries
Also, I'm using a 20cm cake tin.
Directions
MAKE THE CAKE BATTER
- Whisk the sugar and butter (softened/room temp) together.
- Add the flour and baking powder (run them through a sieve to avoid lumps) and add the eggs. Note: don’t forget to add xanthan gum and extra baking powder if you’re using a plain flour blend instead of self-raising.
- Then whisk in the sour cream and oil. Just a tip, don’t over-mix your batter.
BAKE THE CAKE
- Pre-heat the oven to 160C (320F).
- Grease your cake tin with butter and add baking paper at the bottom (cut it to fit the size of your tin). Note: I’m using a 20cm cake tin.
- Pour in your batter and spread it as evenly as possible with a spatula.
- Bake for about 30 mins (for a normal size cake) or about 15 mins for mini cakes/cupcakes. Until your cake is lightly golden and springy to the touch. Note: to know if it’s fully cooked, poke it with a metal skewer or knife. If it comes out clean, it’s done. If not, carry on cooking.
LET IT COOL DOWN & BRUSH SYRUP ON TOP
- Take your cake out of the oven and let it cool down in the tin for about 5 minutes.
- Then carefully take it out, peel off the baking paper and let it cool upside down on a cooling rack.
- Once cool, brush a simple syrup all over with a pastry brush. Either honey or syrup (watered down with an equal part of hot water) or a mixture of sugar and water (equal parts), cooked briefly on low heat.
DECORATE YOUR CAKE
- Spread a generous amount of jam on one layer. Note: if you’re making a half cake, like me, just cut your cake in half. 🙂
- Add the second second layer on top.
- Spread icing of your choice on top and around the side.
- Add fresh berries on top.
Hope you like it! 🙂
Kimi x


Can we freeze the baked cake? Did you try that?