I’ve been on such a bread kick lately (taking a small break from desserts 😉 ) and here’s my latest success: a lovely, soft and delicious gluten free rustic raisin bread. 🙂
It’s essentially a modified version of the Turkish bread recipe I posted last weekend, but with added butter, cinnamon, vanilla and raisins. It came out beautifully again; super soft with a really nice flavour and a perfect crispy crust.
The perfect breakfast with lashings of melting butter on top! 😀


What you’ll need:
- A gluten free flour blend made for bread a.k.a. strong flour. These blends have a higher protein content which helps breads rise, keep their shape and have a better texture. I used Freee Foods / Doves Farm, but of course feel free to substitute with whatever blend is available to you where you live.
- Tapioca starch/cassava flour. This is such a fantastic addition to gluten free baked goods that really improves the texture and adds elasticity.


- 80g whole milk
- 20g butter
- 40g sugar
- 1 tsp (5g) dry active yeast (I used Allinson)
- 150g gluten free bread flour (+ extra for shaping the bread)
- 40g tapioca starch
- 1 large egg
- 70g raisins (soaked)
- ½ tsp xanthan gum (or 1 tsp if your flour blend doesn't already contain it)
- ⅓ tsp salt (or ½ tsp if using unsalted butter)
- 3 tsp ground cinnamon
- 1 tsp vanilla extract
- 1-2 Tbsp olive oil (to brush on top of the bread)
BAKING TIME: 25 minutes
* Cover your raisin bread in foil midway through the cooking process once browned.
*This recipe yields a small loaf only – multiply as needed.
Directions

SOAK THE RAISINS:
- Soak your raisins in hot water for about 15 minutes. Note: the goal is to re-hydrate the raisins so that they don’t end up absorbing the moisture from your dough. As we all know, gluten free bread is already susceptible to being dry so we don’t want to lose any moisture at all. 🙂
PREPARE THE YEAST:
- Add the milk and butter into a large bowl and heat it up in the microwave (in 10 second increments, stirring occasionally) until the butter has fully melted and the mixture is very warm. Dip your finger in to check; it should be somewhere in between lukewarm and boiling. If it’s too hot (boiling) or too cold, it won’t work.
- Stir in the sugar until fully dissolved.
- Then add the yeast, stir and let it rest in a warm spot for 5-10 minutes, until it becomes frothy. Note: you can place it directly in the sun when it’s warm, but if it’s a cold day, you can turn on the oven to the lowest heat and place your bowl on or near the opened door.
PREPARE THE DOUGH + FIRST ROUND OF PROVING:
- Once the yeast mixture is ready, add the flours, salt, xanthan gum, cinnamon, egg and vanilla and mix with a spatula until smooth and lump free.
- Then drain your raisins and stir into the dough.
- Cover your bowl with cling film and let your raisin bread dough rest in a warm spot for 1 hour, until it has doubled in size. Note: Don’t skip this step as it’s important for the yeast to take action.

SHAPE YOUR RAISIN BREAD + SECOND ROUND OF PROVING:
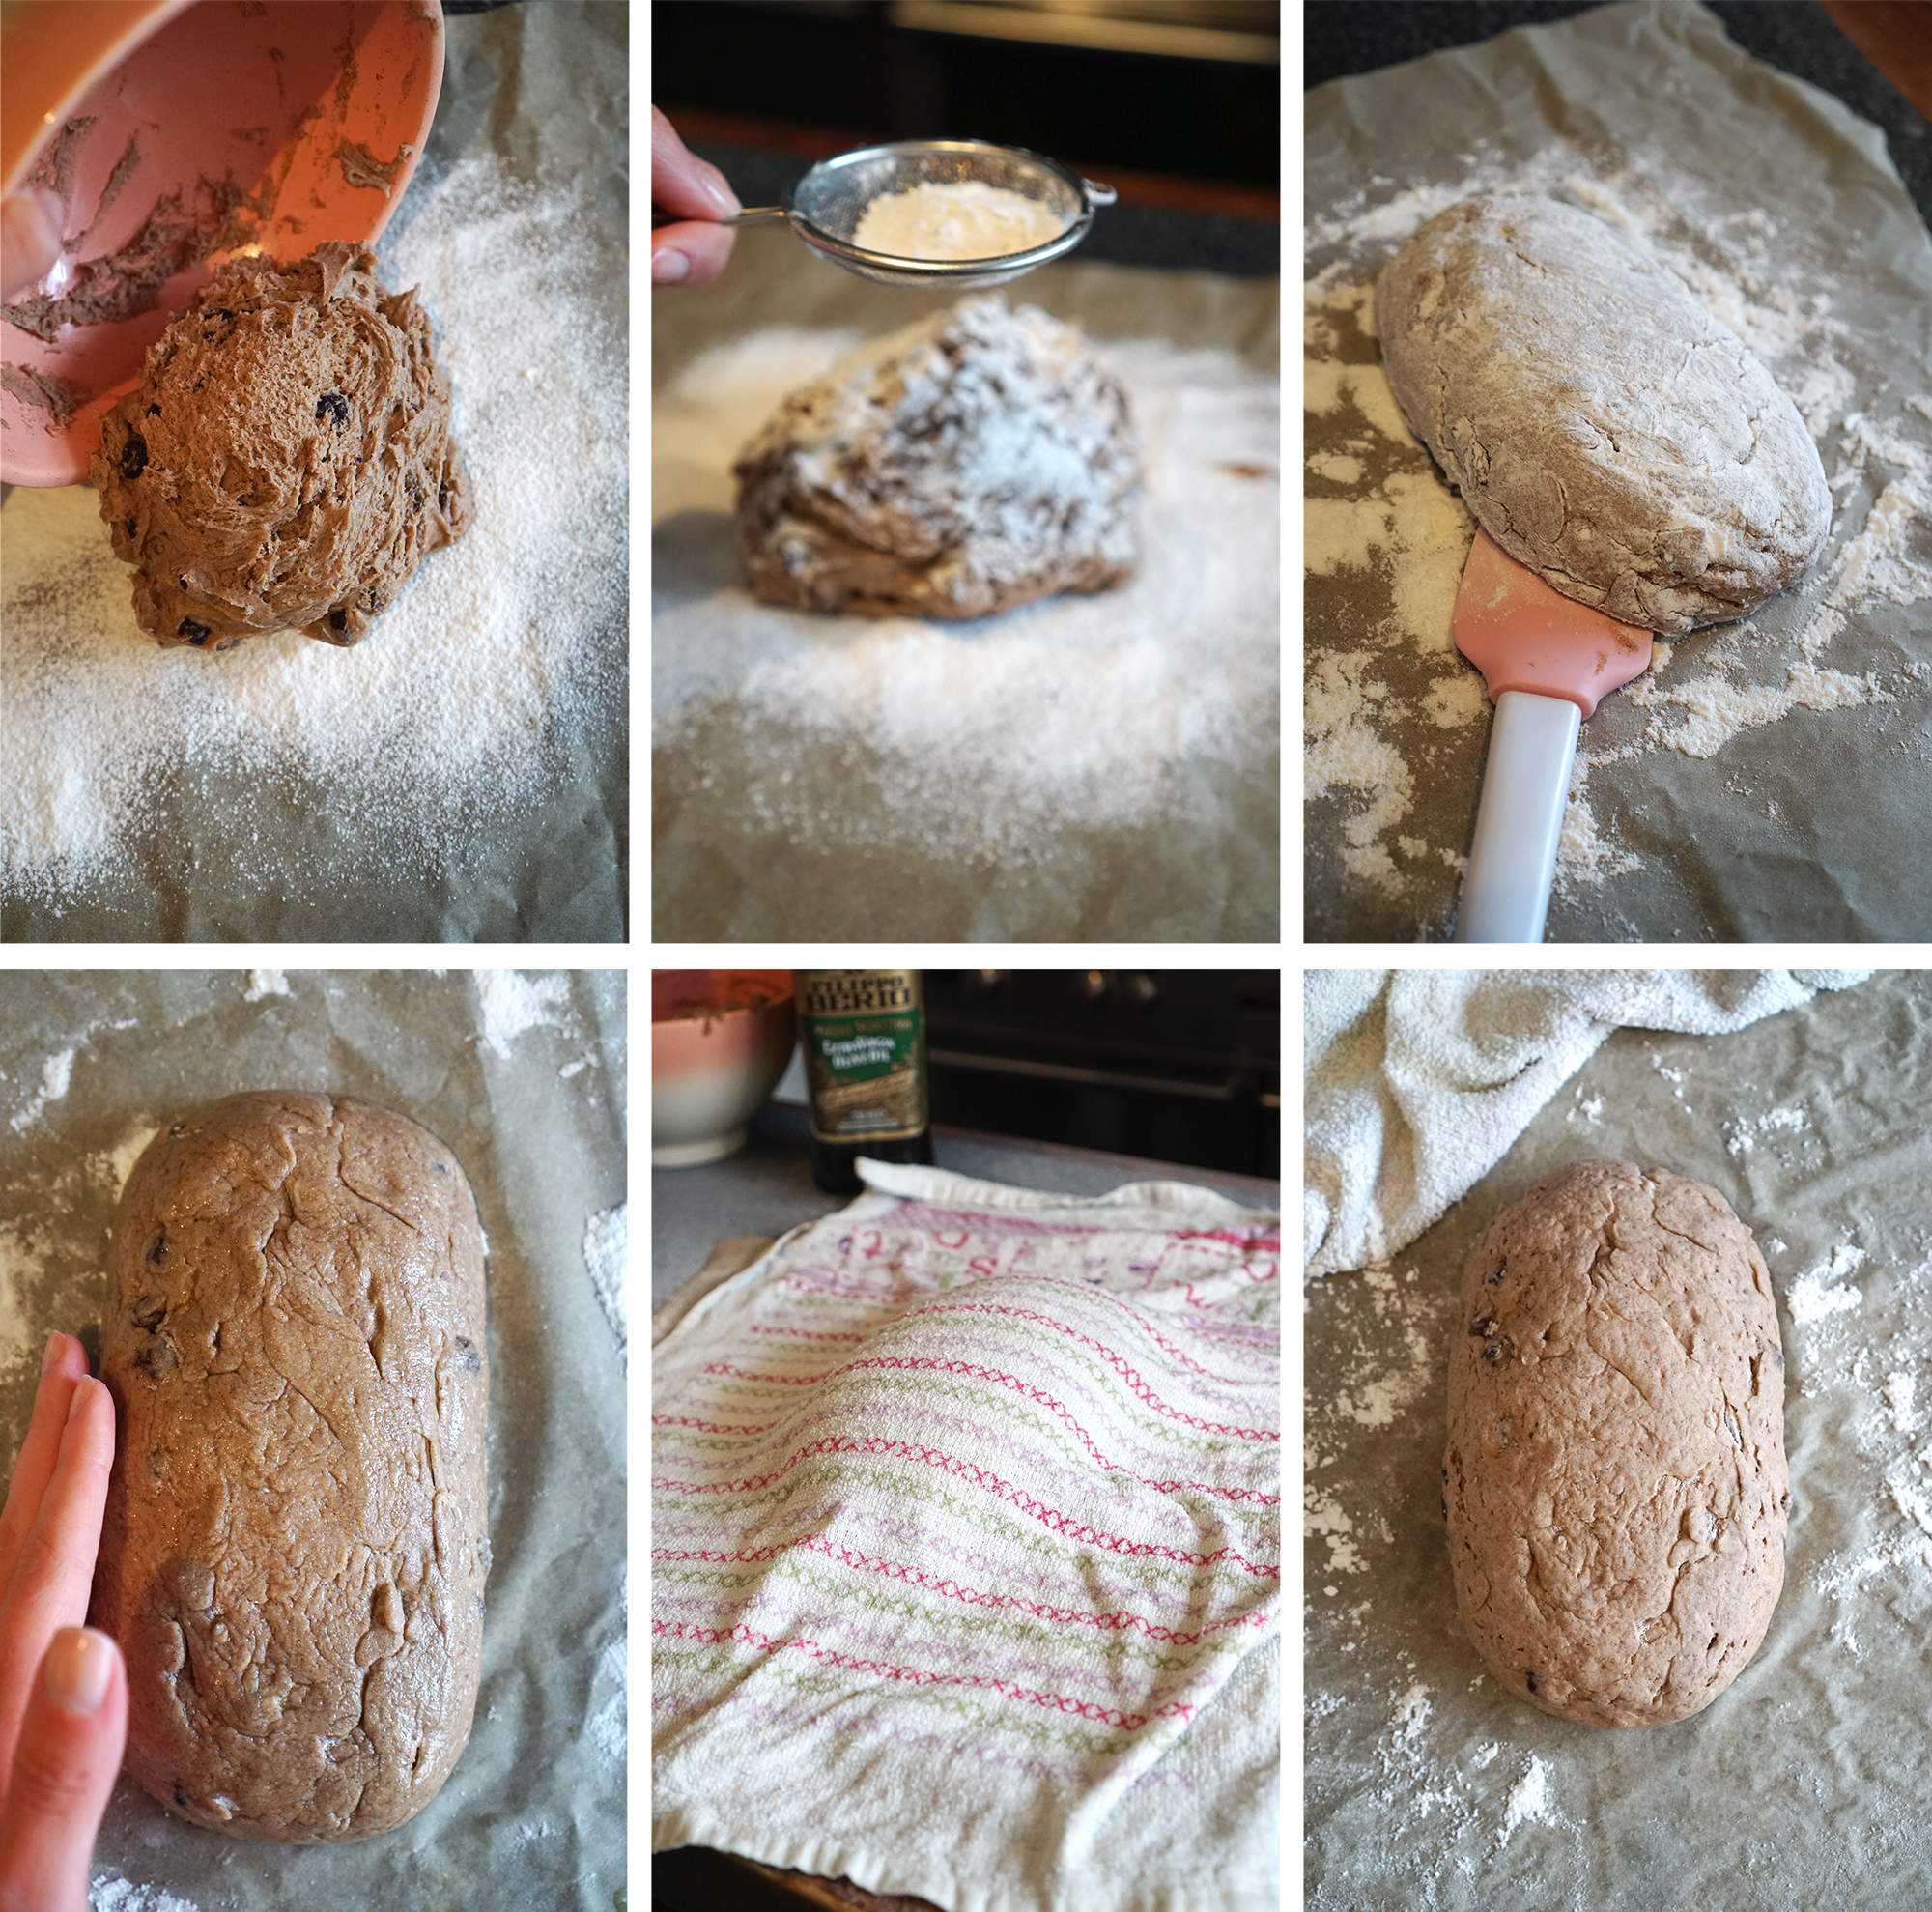
- Lay a sheet of baking paper on your work surface and sprinkle a generous amount of extra flour on top.
- Tip your dough onto it and sprinkle some extra flour on top.
- Then gently shape your loaf with your hands without squishing and deflating the dough.
- Carefully run a clean spatula under, pushing some of the loose flour underneath, to make sure your loaf isn’t sticking to the baking paper.
- Brush away any excess flour from the top and cover your loaf with olive oil by patting it in with your fingers. You can correct the shape of your bread and smooth any cracks in the process.
- Cover with a damp cloth or damp kitchen towels and let it rest for another 45 mins to an hour.
BAKE YOUR RAISIN BREAD:
- Pre-heat your oven to 190C (375F) and don’t rush it; make sure you give it enough time to properly warm up (at least 20 minutes).
- Transfer your loaf (along with the baking paper) onto a baking tray.
- Bake your raisin bread for about 25 minutes on the middle shelf. Around 15 minutes in (as soon as it starts to brown on top), cover with foil for the rest of the cooking time.
- Take it out, let it cool down, slice with a serrated knife, toast and serve!
- Store any leftovers in an airtight container.
HOW TO REVIVE HARD / STALE LEFTOVERS:
Unfortunately it’s a fact of life that homemade bread is always best eaten fresh and has a tendency to harden up very fast, whether it’s gluten free or not. But here’s what you can do to bring it back to life and soften it up again:
- Dip your raisin bread loaf into a bowl of water briefly or run it under the tap to wet it. Don’t overdo it of course, but you want it to be reasonably wet.
- Then place your wet loaf on a baking tray lined with baking paper.
- Bake in a pre-heated oven at 220C (425F) for 5-10 minutes, until the crust is dry again. Then slice and toast. 🙂
P.S.: you can also microwave your leftover slices before toasting them, but the above method gives better results in my opinion.
Hope you enjoy it! 🙂
Kimi x


