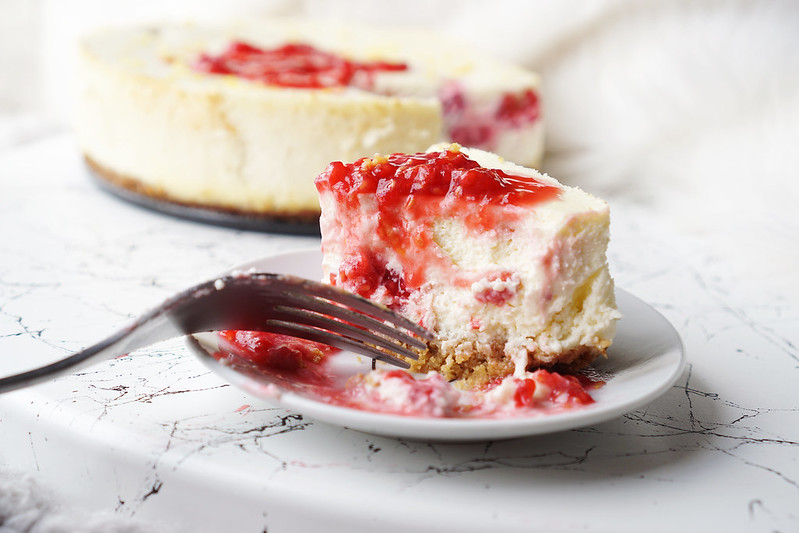
A super creamy rose, raspberry and lemon cheesecake I made yesterday with lemon zest and a raspberry & rose coulis on top. ??
It’s pretty much the same recipe as the last cheesecake I posted not that long ago, except I actually put in two times less sugar this time and you know what, it ended up tasting just as good! I also swapped the lime for lemon and added some rose flavouring and raspberries which was a such a good flavour combo. ?
As gluten free cakes go, in my opinion cheesecake is one of the easiest and since it uses very little flour (only two tablespoons in this recipe), there’s zero risk of ending up with a stereotypically dry, crumbly, underwhelming gluten free situation. lol

TIPS:
1. Use rose water flavouring (the concentrated kind made from rose extract – like this one), not standard rose water which is much weaker (so you’d have to add way too much liquid to the cake to give it enough flavour).
2. Use a springform cake tin with a clip that allows you to remove the side from the base as it makes everything a lot easier.
3. Before popping the cake tin open (if using a springform cake tin), carefully cut along the side of the cake to make sure it’s not sticking to the pan. Otherwise it could cause your cake to crack all over the place!
4. Don’t skip the resting time (1 or 2 hours in the switched off oven). It’s important for the cake to reach the right consistency.
5. Let the cake sit in the fridge for a while before eating.

Rose, Raspberry & Lemon Cheesecake Recipe:

- 500g cream cheese
- 85g soured cream
- 60g granulated sugar
- 2 Tbsp gluten free self-raising flour (I used Doves Farm)
- Pinch of salt
- 1 + ½ eggs (75g)
- Zest of 1 lemon
- Juice of half a lemon (or more / to taste)
- Rose water flavouring (to taste - the concentrated kind made from rose extract)
- 100g raspberries
- 135g gluten free digestive biscuits
- 2 to 4 Tbsp butter (softened)
- Extra butter (or oil) to grease the cake tin
- Raspberries
- Corn syrup
- Water
- Rose water (Optional: if you want a stronger rose flavour)
180C (356F) for 10 mins (for the cookie crust alone)
+
220C (428F) for 10 mins (with the cheesecake batter)
+
110C (230F) for 25 mins
+
1 to 2 hours (sitting in the oven with the heat completely turned off)
* I recommend using a springform cake tin with a clip that allows you to remove the side from the base. It makes things so much easier.

Directions
Step 1: The crust:
- Crumble the cookies as fine as possible and add the butter (melted in the microwave first).
- Grease your cake tin (both the bottom and the sides) with butter or oil and add the cookie mixture at the bottom, pressing it down with a spoon so it’s compact. Note: I recommend using a springform cake tin.
- Bake in a pre-heated oven (180C / 356F) on the middle shelf for 10 minutes. Then take it out and let it cool down while you prepare the filling.
Step 2: The filling:
- Turn the oven temperature up to 220C / 428F.
- With a handheld mixer with paddle attachment (or a whisk), beat the cream cheese for a couple of minutes on low/medium speed until smooth and creamy.
- Add the sugar, flour and salt and keep mixing, scraping the sides with a spatula from time to time to make sure everything is mixed properly.
- Add the lemon juice and zest, rose flavouring and then add the eggs, followed by the soured cream and mix briefly until you reach a smooth and somewhat light and airy consistency (but don’t overdo it). NOTE: add all your flavourings before adding the eggs and taste test and add more if necessary.
- Stir in some raspberries and pour the content into your cake tin, making the top as flat and smooth as possible with a spatula.
Step 3: Bake the lemon cheesecake:
- Bake for 10 minutes on 220C / 428F, then turn the temperature down to 110C / 230F and keep cooking for another 25 minutes. When shaking the pan, the cheesecake should still wobble slightly.
- At this point, turn the oven off completely and leave the cake sitting in there with the oven door closed or slightly opened for an hour or two.
- Then store the cake in the fridge (and let it sit in the fridge for a while before eating so it reaches the perfect texture).
- Gently cut along the side of the cake tin with a knife to make sure it didn’t stick to the pan before popping the cake tin clip opened.
Step 4: Make the coulis:
- Mash some raspberries and add a bit of syrup and water, just enough to give it a sauce consistency. You can also add a bit more rose flavouring for an even stronger flavour.
Enjoy!


I just made this for my mom’s birthday and received a lot of positive feedback! I used gluten free graham crackers instead and regular gluten free flour. I noticed that there wasn’t any reviews so I decided to be the first, I hope that this recipe receives more attention in the future.