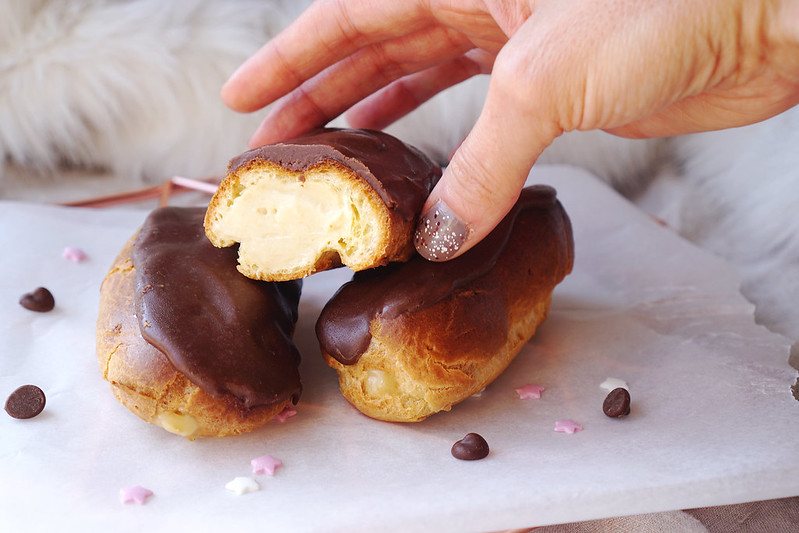
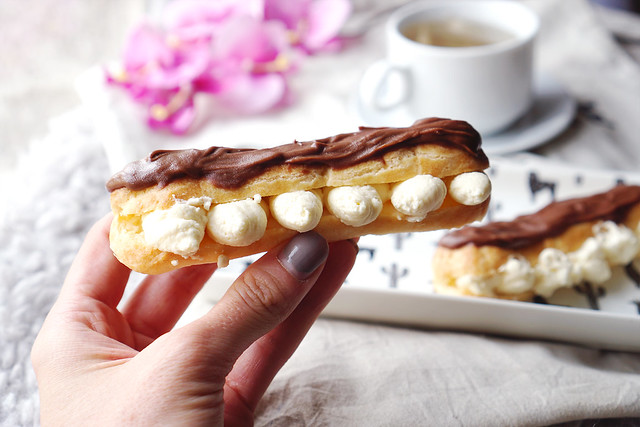
I posted these gluten free eclairs last year, but after much thought I decided to go back to the drawing board and made a lot of changes to the recipe. I wasn’t completely happy with the result at the time and I’ve since gotten so much better at making choux pastry in general.
———————————————
UPDATE (13.03.21): I NOW HAVE NEW ECLAIR RECIPE
It’s much better than this old one so I recommend checking that one out instead. You can find it: HERE. 🙂
 |
 |
———————————————
So after a series of mediocre/failed attempts (I must have eaten a lifetime’s supply of eclairs in the last two weeks lol), I think I’ve finally reached a result I’m happy with! Perfectly puffed up, hollow on the inside, gluten free eclairs with an outer shell strong enough not to collapse during the cooking process.

First of all, I ditched the plain flour and opted for self-raising. I know that eclairs are traditionally made without raising agents (the eggs do all the job), but if there’s one thing I’ve learned over the years it’s that sometimes when baking with gluten free ingredients, you have to say “to hell with the rules”. 😛
So I used my trusted Doves Farm self-raising flour for these and the result was so much better. All my attempts with plain flour led to eclairs that were much more dense and not quite right. Whereas the self-raising flour yielded a pretty good result:

For the filling, you can use whipped cream (as a quick option), but nothing beats the classic pastry cream (a very thick form of custard). It’s a bit more time consuming to make as it has to sit in the fridge for a few hours, but it’s very easy and well worth it.
MY TIPS:
1. Use a French star tip to pipe out the dough. It’s said to help the eclairs keep their shape as they puff up and it also prevents cracks. If you don’t have one, you can also add the ridges on top of your piped out eclairs with a fork.
2. Two ways to cook them. A lot of recipes call for a big burst of heat to start with (220C for 10 mins) followed by 20-25 mins at a lower temperature (175C), but this method has failed a few times and left me with eclairs that collapsed. In my experience, cooking gluten free eclairs on a lower, constant heat (190C / 375F) for 30-35 mins has worked a lot of better. Ovens can vary a lot, give both a try and see what works for you.
3. Add the eggs in slowly, little by little. The quantity of eggs you’ll need will vary depending on certain factors such as the flour blend you use, the size of your eggs and how much liquid is left in your dough before adding the eggs. Hence why I wrote 2 to 3 eggs in the ingredients list, as a guide. Add as little or as much as you personally need to reach the correct consistency: it should run downwards when you hold the spatula up, but should not be wet enough to drip into the bowl (see picture collage further down).
Can I freeze them / choux pastry?
Yes you can! Instead of cooking a bunch of pastries and having too many to eat in one go, you can simply divide the dough into portions and freeze them individually (wrapped in cling film and put in properly sealable freezer bags). Some pastry chefs even swear by this.
You can also freeze cooked profiteroles and eclairs, but I’ve never actually tried it myself.

Gluten Free Eclairs Recipe:

- 85g gluten free self-raising flour (I used Doves Farm)
- ½ tsp xanthan gum
- ½ tsp sugar
- Pinch of salt
- 50g butter
- 150ml whole milk
- 2 to 3 large eggs
- 320g whole milk
- 2 egg yolks
- 1 Tbsp unsalted butter
- 20g cornflour
- 80g sugar
- 1-2 tsp vanilla extract
- Optional: the zest of 1 to 2 lemons for lemon pastry cream
- 150ml double cream/whipping cream
- 2 Tbsp icing sugar
- 1-2 tsp vanilla extract
- 50g chocolate chips
- 2 heaped tsp unsalted butter
190C (375F) for 30 to 35 mins
+
20 mins sitting in the oven (door opened/heat turned off)

How to make the eclairs:
Make the dough (PART 1):
- Mix the flour, sugar, xanthan gum and salt together in a bowl and then ideally run it through a sieve (but if you don’t have one, it’s not the end of the world).
- Combine the milk and butter in a saucepan, turn the temperature up to medium/low and slowly melt the butter, stirring constantly. Then once you reach simmering point (a very light simmer), turn the heat off completely.
- Immediately add the dry ingredients and stir with a spatula until the dough comes together. Then turn the heat back on and cook the dough briefly on low heat, mixing and mashing it constantly, to get a dryer dough / get rid of any excess liquid hiding in there. But be careful, you don’t want to overdo it and overcook the dough. Then transfer it into a bowl and let it cool down (this step is important as we’re adding eggs next and we don’t want the heat to start cooking them).
Make the dough (PART 2 – adding the eggs):
- Once the dough has cooled down/is lukewarm, add the eggs little by little (beaten in a bowl first) and mix with a spoon, spatula or an electric hand mixer (with mixing paddle attachments; those ones that look like hooks, not the whisks). At first it will look lumpy and not at all like dough, but this is normal. Keep on mixing until smooth. IMPORTANT: keep on adding a little egg until you reach the perfect texture i.e. the dough should be wet enough to run downwards when you hold the spatula up, but solid enough not to actually drip into the bowl (like in the picture collage above). This quantity will vary for everyone depending on what flour blend you use and how much liquid was left in your dough before adding the eggs.
Pipe your eclairs:
- Transfer the dough into a piping bag with a medium/large sized round or star shaped nozzle and pipe it onto the baking tray (lined with baking paper) in 2.5 cm wide strips, leaving enough space between each eclair to allow for a bit of spreading. Tip: add a bit of dough on each corner of the baking tray, underneath the baking paper, to secure it. This makes the piping process so much easier.
- Brush a bit of water over the eclairs (with your fingers or a pastry brush) and smooth any imperfections.
Bake your gluten free eclairs:
- Pre-heat the oven to 190C (375F).
- Bake for 30 to 35 mins, until your gluten free eclairs have turned a nice golden brown colour.
- Turn the heat off, open the oven door and let the eclairs sit in the oven until cool (for another 20 minutes or so), but first poke holes on each end of the eclairs to allow the steam to come out (I like to use a chopstick for this). This step is important to make sure the inside of the eclairs dry out, otherwise too much moisture can cause the bottom of the eclairs to collapse shortly after baking.
- Once fully cooked and cooled, fill your eclairs using a piping bag with a small nozzle. Or you can cut an opening straight across each eclair which allows for more filling and is less of a hassle.
For the chocolate icing:
- Fully melt the butter in the microwave in 10 second increments, stirring in between.
- Add in the chocolate chips and stir until melted (microwave again in 5-10 seconds increments if necessary).
For whipped cream filling:
- To make whipped cream: combine double cream, icing sugar and vanilla extract in a bowl and mix with a whisk or electric mixer until the cream stiffens.
- Add the whipped cream into a piping bag with nozzle of your choice and pipe it in.
For pastry cream:
- Combine the egg yolks, cornflour, half of the sugar and the vanilla extract in a bowl.
- Add the milk and half of the sugar into a sauce pan and bring to a simmer on medium heat, stirring constantly with a whisk.
- Pour some of the warm milk in the bowl and whisk until everything has dissolved, then add it back into the sauce pan with the rest of the milk and keep whisking (still on medium heat) until the cream has thickened. This should take about 1 minute. Add the butter and stir until fully melted, then switch off the heat.
- Pour the pastry cream in a bowl, cover with cling film and refrigerate for a few hours before using. Note: to prevent a film from forming on top, press the cling film on the surface of the pastry cream.
- Once ready to use, transfer the pastry cream into a piping bag and fill your eclairs.

Enjoy!
Kimi x


Pingback: Gluten Free Eclairs / My Upgraded Recipe :) - Kimi Eats Gluten Free